
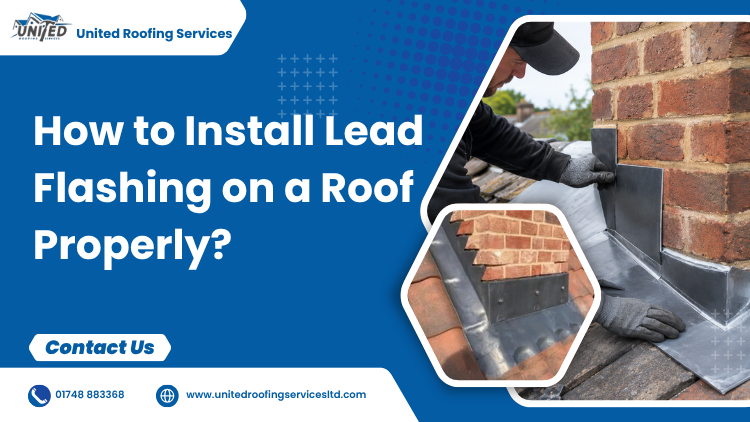
Lead flashing is installed by cutting a chase into a mortar joint, shaping the lead to fit the roof junction, securing it with lead wedges, dressing it against the roof covering, and sealing the chase with mortar or lead sealant. Most domestic roof flashing installations use Code 4 lead, with individual lengths generally limited to around 1.5 metres to allow for thermal movement. Correct overlaps, fixings and dressing techniques are essential to prevent leaks and ensure long-term weather protection.
What Is Lead Flashing?
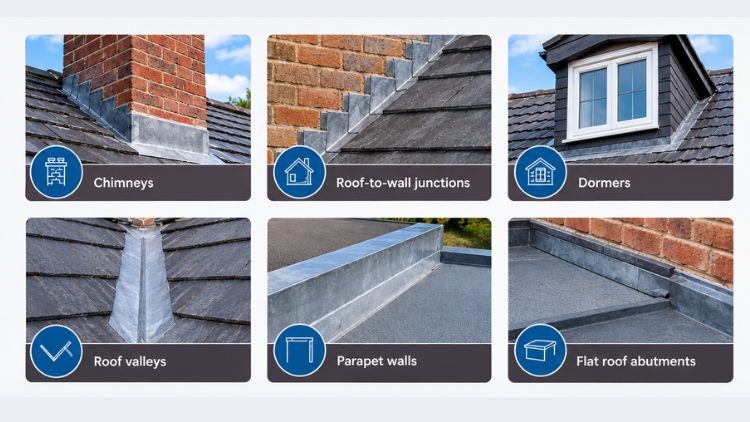
Lead flashing is a weatherproof barrier installed where two building materials meet. It prevents rainwater from penetrating vulnerable roof junctions such as:
- Chimneys
- Roof-to-wall junctions
- Dormers
- Roof valleys
- Parapet walls
- Flat roof abutments
Because lead is flexible, durable and highly resistant to weathering, it has been used in UK roofing for centuries and can often last several decades when installed correctly.
What Tools Do You Need To Install Lead Flashing?
Using the correct tools helps prevent damage to the lead and produces a cleaner finish.
Which Lead Code Should Be Used?
| Lead Code | Typical Use |
|---|---|
| Code 3 | Small flashings and detailing |
| Code 4 | Most chimney and abutment flashings |
| Code 5 | High-exposure locations and larger details |
| Code 6+ | Specialist commercial projects |
For most residential roofing work in Richmond and across the UK, Code 4 lead is the standard choice.
How to Install Lead Flashing
Step 1: Inspect and Prepare the Area
Before installing new flashing:
- Remove old flashing
- Remove loose mortar
- Clear moss and debris
- Check roof tiles or slates for damage
- Ensure brickwork is sound
Installing flashing over damaged masonry or roof coverings often leads to premature failure.
Step 2: Cut the Chase
A chase is the groove cut into the mortar joint where the flashing will be secured.
Best practice is to:
- Cut approximately 25mm deep
- Follow a mortar joint where possible
- Keep the chase straight and clean
- Remove dust and loose material
The chase provides the mechanical fixing point for the lead flashing.
Step 3: Measure and Cut the Lead
Accurate measuring is essential.
When cutting lead:
- Measure twice before cutting
- Allow for overlaps
- Avoid excessively long pieces
- Keep individual lengths around 1.5m maximum
Shorter sections reduce stress caused by expansion and contraction during temperature changes.
Step 4: Shape the Lead Flashing
The lead should be dressed carefully to match the roof profile.
Roofers typically use:
- Lead dressers
- Bossing sticks
- Soft mallets
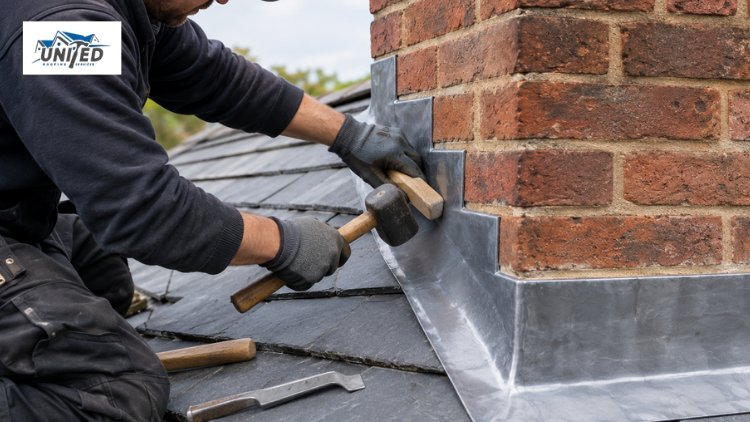
The aim is to achieve a tight fit without stretching or cracking the lead. Excessive force can weaken the material and shorten its lifespan.
Step 5: Insert and Secure the Flashing
The top edge of the flashing is inserted into the chase.
It is then secured using:
- Lead wedges
- Hall clips
- Compatible fixings
Professional roofers avoid nailing directly through exposed lead because this restricts movement and can eventually create leaks.
Step 6: Dress the Lead Over The Roof Surface
The lead should sit neatly over:
- Roof tiles
- Slates
- Chimney aprons
- Wall abutments
Work from the centre outward to avoid wrinkles and ensure water sheds correctly.
Step 7: Seal The Chase
Once secured:
- Point the chase with mortar or
- Apply a specialist lead sealant
This creates a watertight finish and prevents water from entering behind the flashing.
Step 8: Apply Patination Oil
Patination oil helps:
- Reduce staining on brickwork
- Minimise oxidation marks
- Improve appearance during weathering
Many professional lead installers apply it immediately after installation.
Common Types of Lead Flashing
Different parts of a roof need different lead flashing details. A chimney needs a combination of apron, stepped and back gutter flashings, while a wall abutment usually needs a continuous stepped flashing. Valleys use a lead-lined gutter to carry heavy volumes of water. Whichever detail you use, the principle is the same: water must always run over a joint, never into it.
stepped Flashing
Used where a pitched roof meets a wall.
Each piece overlaps the one below to direct water safely down the roof.
Apron Flashing
Installed at the front of chimneys and roof abutments.
It directs rainwater away from vulnerable junctions.
Valley Flashing
Installed in roof valleys where two roof slopes meet.
It carries large volumes of rainwater safely into the gutter system.
Chimney Flashing
Combines step flashing, apron flashing and back gutter details to protect the entire chimney structure.
Common Lead Flashing Installation Mistakes
Using Pieces That Are Too Long
Lead naturally expands and contracts.
Overly long sections can split or crack over time.
Insufficient Overlaps
Poor overlaps allow water to track behind the flashing.
Many installations require overlaps of approximately 100mm to 150mm depending on the detail.
Fixing Through The Lead
Direct fixings can restrict movement and increase the risk of failure.
Shallow Chases
A shallow chase may not hold the flashing securely during strong winds and weather exposure.
Can You Install Lead Flashing Yourself?
While experienced DIYers may be able to fit simple flashing details, leadwork requires specialist skills.
Incorrect installation can lead to:
- Roof leaks
- Internal damp
- Timber decay
- Costly repairs
Complex chimney flashing, valleys and heritage roof details are usually best left to experienced roofing contractors.
If your property is in West London, our team provides expert lead work services in Richmond, including new lead flashings, repairs, valleys, chimney work and period property restoration.
Conclusion
Lead flashing remains one of the most reliable methods of waterproofing roof junctions. Whether installed around a chimney, roof valley or wall abutment, the key to long-term performance is correct detailing, adequate overlaps, proper fixing methods and allowance for thermal movement. When installed properly, lead flashing can protect a roof structure for decades while significantly reducing the risk of leaks and water damage.
Need Professional Lead Work?
If you would rather have it done right the first time, contact United Roofing Services Ltd for professional lead work in Richmond.
FAQs
How deep should a chase be for lead flashing?
Most lead flashing chases are cut approximately 25mm deep into a mortar joint.
What lead code is used for roof flashing?
Code 4 lead is commonly used for domestic chimney and abutment flashing.
How much overlap should lead flashing have?
Most flashing details require overlaps of around 100mm to 150mm depending on the application.
How long does lead flashing last?
Correctly installed lead flashing can often last 60–100 years.
Why does lead flashing crack?
Cracking is usually caused by thermal movement, poor installation, overlong sections or incorrect fixing methods.
Can lead flashing be installed in the rain?
It is best avoided. Wet surfaces are slippery and prevent proper bonding of mortar or sealant.
