
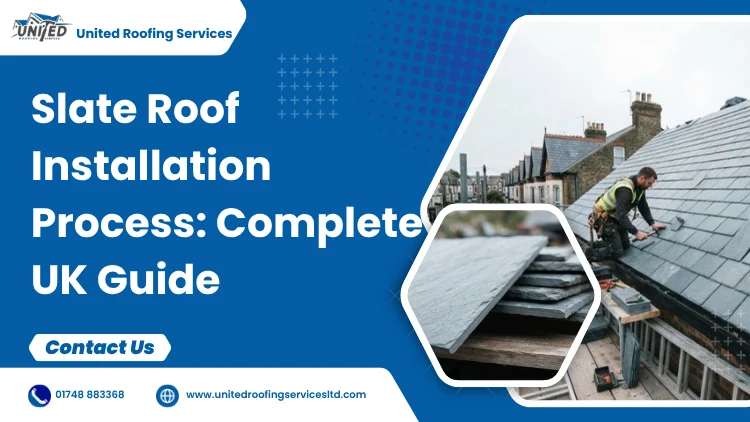
A slate roof installation process follows a fixed sequence: checking the roof pitch, preparing the timber deck, fitting a breathable underlay, setting out the battens, then laying the slates from the eaves upward in overlapping courses, before finishing the ridge, hips, valleys and verges. BS 5534, the British Standard for slating and tiling, governs every stage, and the price you pay depends on slate type, roof size and access.
Slate has been used on British roofs for centuries, and it’s not hard to see why. It’s tough, weatherproof, and it ages beautifully rather than just wearing out. But a slate roof is only as good as the way it’s put together. Get the slate roof pitch requirements wrong at the planning stage, and the rest of the job is built on a shaky foundation.
This guide walks through exactly how a slate roof is installed from start to finish, what it costs in the UK, and why it’s not really a job for a weekend DIYer.
What Is a Slate Roof, and Why Does the Material Matter?
Slate is a natural metamorphic rock that splits into thin, flat, incredibly durable sheets. That’s what makes it so well suited to roofing. It’s dense, low-porosity, and naturally weather-resistant, so a well-installed slate roof can comfortably outlast the building underneath it.
There are two broad categories homeowners choose between:
- Natural slate: quarried stone, commonly sourced as Welsh slate, Spanish slate or Canadian slate. Prized for its authentic texture and colour variation.
- Synthetic or fibre cement slate: artificial alternatives designed to mimic the look of natural slate at a lower weight and cost.
The choice between natural slate and synthetic slate roof materials affects almost every later decision, including fixing method, roof structure requirements and, of course, budget. If you’re still deciding which roofing material suits your property, our guide to the different types of roofing materials we work with across Richmond breaks this down further.
The Slate Roof Installation Process, Step by Step
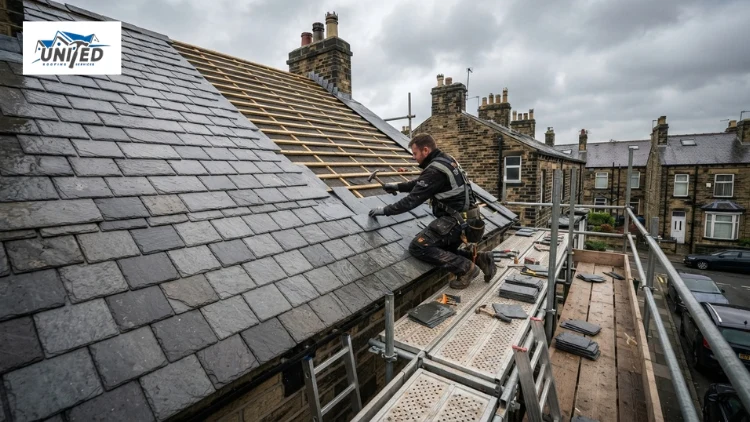
Here’s how a slate roof job unfolds on site, in the order a professional roofing team carries it out. It follows UK practice and BS 5534, the British Standard for slating and tiling, and always defers to the slate manufacturer’s own instructions.
Before the work starts: access and safety
Slate roofing is work at height. A properly erected scaffold with edge protection and a safe route up is in place before anything else happens. Slate is also heavy, so on a re-roof the existing structure needs checking to confirm it can carry the load.
Step 1: Survey and design check (pitch and head lap)
Before any materials go on, the roofer works out whether the chosen slate suits the roof. Pitch is the roof angle from horizontal, and head lap is the distance each slate overlaps the course below it.
- Natural slate generally needs a minimum pitch of around 20° to 25°, depending on slate size and exposure. Lower pitches need specialist detailing and manufacturer approval.
- Shallower pitches need more head lap, because water runs off more slowly and wind-driven rain is pushed further up under the slates.
- More exposed sites, such as coastal areas and hilltops, also need more head lap.
- The head lap then sets the batten gauge, the spacing between rows of battens (Step 4 shows the calculation).
Get this wrong, and the roof is under-lapped, which is one of the most common causes of leaks in poorly fitted slate roofs.
Step 2: Preparing the Roof Structure
Most UK slate roofs are built on rafters with underlay and battens and no solid deck. Some older or higher-spec roofs have timber boards (sarking) under the underlay. Either way, the structure is inspected first for:
- Rot, movement or sagging timber
- Old nails, splinters or debris left from a previous roof
- A secure, level surface for the underlay, whether that’s the rafters or the sarking boards
Replace damaged timber at this stage. It’s easy to rush and expensive to skip, since slates laid over uneven timber rarely sit flat for long.
Step 3: Fitting the Breathable Underlay
The underlay (also called the membrane) is a second line of defence against water and helps manage condensation in the roof space.
- Start at the eaves and work upward in horizontal rows.
- Horizontal laps are typically at least 100mm, and more on shallower pitches. The manufacturer’s instructions set the exact figure.
- Fix them with clout nails and lay them with a slight drape between the rafters, not pulled tight. The drape lets any water that gets through run down to the eaves instead of pooling.
Step 4: Setting Out the Battens
Battens are the horizontal timber strips the slates are nailed to. Their spacing, the batten gauge, keeps each course correctly overlapped. The calculation is:
Gauge = (slate length − head lap) ÷ 2
For example, a 500mm slate with a 75mm head lap gives (500 − 75) ÷ 2 = 212.5mm, so battens are set at 212.5mm centres. A longer slate or a smaller head lap increases the gauge, which exposes more slate per course.
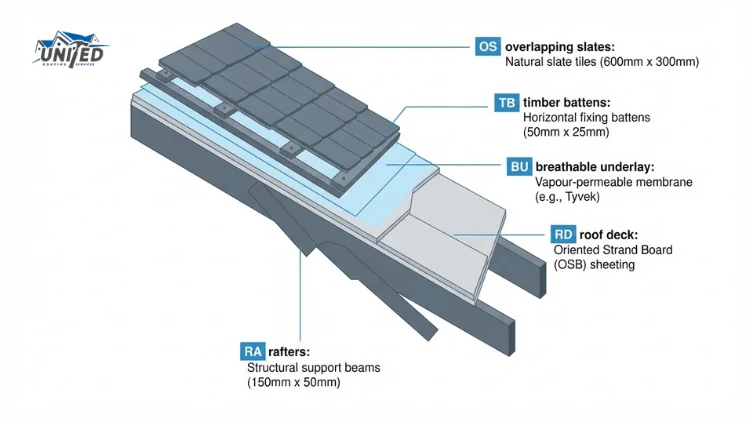
Step 5: Laying the Eaves Course
The eaves are one of the most exposed parts of a slate roof, so this course gets special attention.
- An under-eaves course goes down first, with the finished edge facing down and projecting roughly 50mm into the gutter so water clears the fascia.
- A full-length slate course goes above it, with the tails (the bottom edges) flush with the under-eaves course.
- The joints of the two courses are broken, so no joint sits directly over another.
Step 6: Laying the Main Courses
From here the roofer works upward from one bottom corner toward the ridge.
- Lay slates in a bond: each slate is centred over the joint between the two slates below it, so water can never run straight down a joint.
- Fix each slate with two nails, driven home without overtightening.
- Use copper, stainless steel, or aluminium nails. Galvanised steel corrodes and is not suitable. Length depends on slate thickness and batten depth, so follow BS 5534 and the manufacturer’s guidance.
- Leave a small gap, usually 2 to 5mm, between neighbouring slates so they lie flat despite natural irregularity in hand-split edges. (Slate expands very little with temperature, so that isn’t the main reason.)
- Grade slates by thickness where needed, with thicker slates lower on the roof and thinner ones higher up.
Step 7: Finishing the Ridge, Hips, Valleys and Verges
These junctions are where water is most likely to enter. We don’t leave them until the end. We build them in as the slating rises.
- Valleys: where two roof slopes meet, a lead lining or valley trough is laid first to carry the water. The slates are then cut neatly to the line over it.
- Verges: the sloping edges of the roof at the gable ends. An undercloak (a base layer of slate or board) is fixed along the edge, and the verge slates sit over it. They are either bedded in mortar or finished with a dry verge system. Slate-and-a-half widths (a slate one and a half times the normal width) keep the bond correct at the edge.
- Flashing: we fit lead flashing around chimneys, abutments, and other junctions, which we cover in detail through our dedicated lead work services.
Step 8: Finishing the ridge and hips
Only the capping goes on last.
- Ridge: capped with ridge tiles, mechanically fixed, sometimes using a dry ridge system on newer builds.
- Hips: slates are cut closely to the hip line and finished with hip tiles. Hip irons (metal brackets at the base of each hip) stop the hip tiles from slipping.
Ventilation and insulation
A breathable underlay doesn’t work on its own. The roof space still needs the right ventilation at the eaves and ridge, and insulation has to be fitted so it doesn’t block that airflow. Otherwise, condensation can build up and rot the timber.
Nailing vs Hook Fixing: Which Method Is Used?
Two recognised ways to fix natural slate to a roof exist, and the right one depends on pitch and exposure.
| Factor | Nailing | Hook Fixing |
|---|---|---|
| How it secures the slate | Nails go through holes in the slate. | Stainless steel hooks hold the bottom edge of the slate instead of nail holes. |
| Fixings used | Two copper or aluminium nails per slate, sized to the slate’s thickness. | Stainless steel hooks. |
| Pitch | Pitches above 20°. | Generally pitches above 25°. Below 30°, the hooks usually need crimped shanks to stop water creeping along the joints. |
| Use across the UK | The standard method. | Less common. |
| Richmond and Twickenham | Most residential slate roofs are nail-fixed, as it suits the pitch of most period and modern homes in the area. | Used less often locally. |
How Long Does Slate Roof Installation Take?
For an average UK semi-detached or terraced roof, a professional team can usually complete a full slate roof installation within one to two weeks, weather permitting. How long does slate roof installation take on a larger or more complex roof, though? Often longer, particularly with multiple hips, valleys or dormers involved.
Factors that extend the timeline include:
- Poor weather delaying scaffolding or slate laying
- Extensive rafter or deck repairs discovered once the old roof is stripped
- Listed building or conservation area requirements around slate type and appearance
Slate Roof Lifespan
One of the biggest reasons homeowners choose slate is its lifespan. Natural slate, properly installed, can roughly last 80 to 100 years or more, significantly longer than most concrete or clay alternatives. Synthetic slate tends to have a shorter but still respectable lifespan, often in the 30 to 50 year range depending on the product.
If you’re weighing up how this compares with other materials on your property, our guide to how long a roof lasts covers expected lifespans across the full range of roofing types.
British Standards for Slate Roofing (BS 5534)
BS 5534 slate roofing is the official UK Code of Practice covering the design, installation and maintenance of slating and tiling. It sets out minimum requirements for:
- Head lap and batten gauge calculations
- Mechanical fixing methods
- Minimum slate widths (generally no less than 150mm)
- Wind uplift resistance for different site exposures
Alongside BS 5534, natural slate itself is tested against BS EN 12326, which covers quality and performance grading. Roofers who work to these standards, rather than guessing at spacing and fixings, deliver roofs that genuinely last decades, not years. You can read more about how the standard is applied on site on the National Federation of Roofing Contractors website.
Slate Roof Installation Cost
Slate roof installation cost in the UK varies more than most other roofing materials, largely because of the gap between natural and synthetic options.
Rough figures homeowners can expect to budget for:
- Natural slate (Welsh or Spanish): typically the most expensive option per square metre, reflecting both material cost and the skilled labour needed to work with it
- Synthetic or fibre cement slate: a noticeably cheaper alternative that still gives a similar visual finish
- Labour: slating is a specialist trade, and installation time adds significantly to the overall cost of a new slate roof UK-wide, especially on steep or complex roof shapes
Several things push the slate roof installation cost per m2 up or down:
- Roof size and pitch complexity (hips, valleys and dormers all add time)
- Access, including scaffolding requirements
- Whether the existing roof needs stripping first
- Natural versus synthetic slate
- Additional work like re-battening, new underlay, or lead flashing repairs
For a general sense of roofing costs in the local area, our new roof cost guide covers pricing factors that apply across most roofing jobs, not just slate.
Want an exact figure rather than a range? Request a free, no-obligation quote, and we’ll price your roof based on its actual size, pitch and access, not a national average.
Contact Us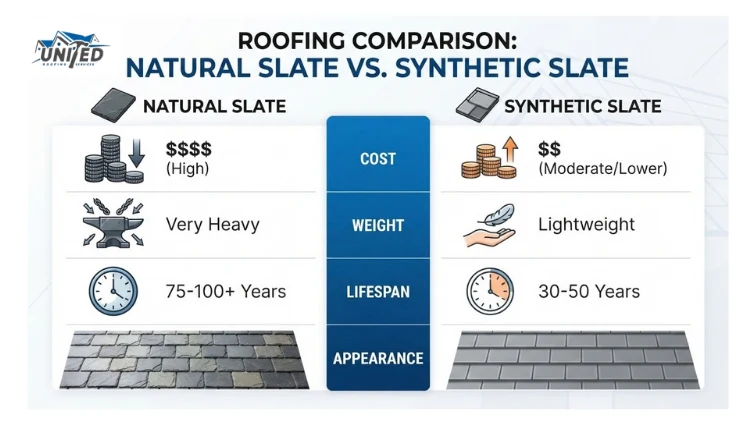
Why Hire a Slate Roofing Specialist?
Slate is unforgiving of mistakes. A roofer working outside slate roof pitch requirements, or without a properly calculated head lap, may not see the fault straight away. It often surfaces as a leak once real weather tests the wrong assumptions for a season or two.
A professional roofing team brings:
- Accurate pitch and head lap calculations from day one
- Correct fixing methods matched to your roof’s exposure
- Full compliance with BS 5534
- Proper flashing and detailing around chimneys, valleys and abutments
- Insurance-backed artistry, so problems are covered rather than left to you
United Roofing Services Ltd has installed and maintained slate roofs across Richmond for over 45 years, working with natural and synthetic slate alike. If you’re planning a new slate roof or replacing an existing one, our roof installation services cover the full process outlined above, from the first pitch assessment through to the final ridge tile.
Frequently Asked Questions
How many slates do I need per square metre?
Roughly 20 to 25 slates per square metre for a standard 500mm x 250mm slate, though the exact number depends on your roof’s head lap and pitch.
Is it safe to walk on a slate roof?
Not directly. Slate is brittle underfoot and can crack without warning, so roofers use roof ladders or crawling boards to spread their weight safely.
Can old slates be reused when installing a new roof?
Yes, if they come off intact. Sound slates are often reused alongside new ones to cut costs and keep a period roof’s original character.
Does a slate roof need extra structural support?
Sometimes. Natural slate is heavy, so older rafters may need checking before installation. Synthetic slate is a lighter alternative where support is a concern.
What’s the best time of year to install a slate roof?
Spring and early autumn are ideal because of milder, drier weather. Installation can still happen year-round, but winter brings more weather-related delays.
Do I need a party wall agreement for a shared roof with my neighbour?
Possibly. Shared roofs on semi-detached or terraced houses can fall under the Party Wall etc. Act 1996, so it’s worth checking before work starts.
