
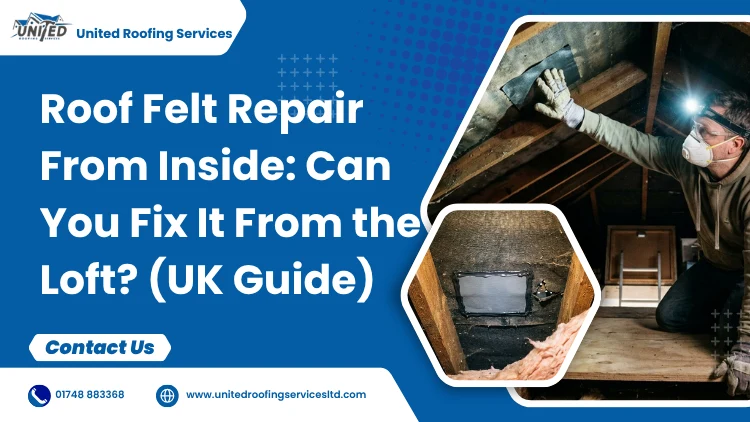
Yes, you can repair roof felt from inside the loft for small tears, holes, and splits, as long as the surrounding felt is still flexible and the tiles above are sound. Clean and dry the area, cover it with compatible repair tape or a patch, seal the edges, and treat it as a short-term fix until a roofer inspects the roof from the outside.
You step into the loft and spot daylight through the felt, or a damp patch spreading across the insulation. Can you fix it from where you’re standing? Often you can, and this guide shows you how to assess the damage, repair it properly, and know when a patch isn’t enough.
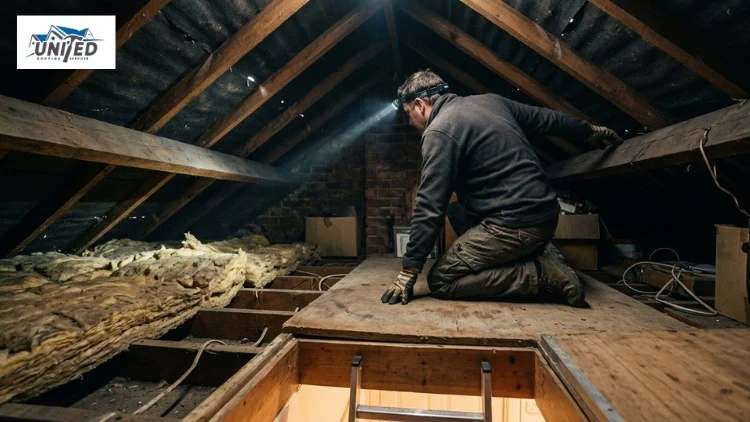
Can You Repair Roof Felt From Inside the Loft?
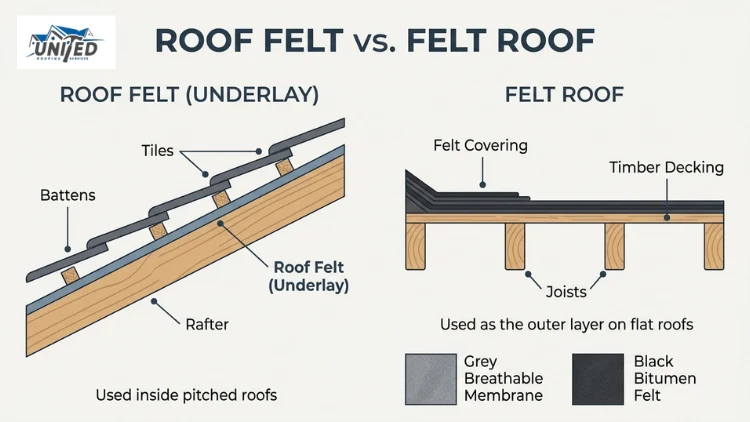
In most homes, yes, but only for limited damage. The felt, also called roof underfelt, sarking felt or roof underlay, sits between the rafters and the battens that hold your tiles. From the loft you can reach its underside. That is enough for a small roofing felt repair, but not for renewing the felt.
What you can fix from inside
An inside roof felt patch works well on:
- Small holes, punctures and short splits
- Tears in an easy-to-reach spot, away from the roof edge
- Felt that is still flexible and firmly attached
- Minor gaps left by a rodent or a stray nail
Signs of Damaged Roof Felt in Your Loft
Damaged felt in roof spaces rarely announces itself loudly. It shows up in small clues.
The daylight test
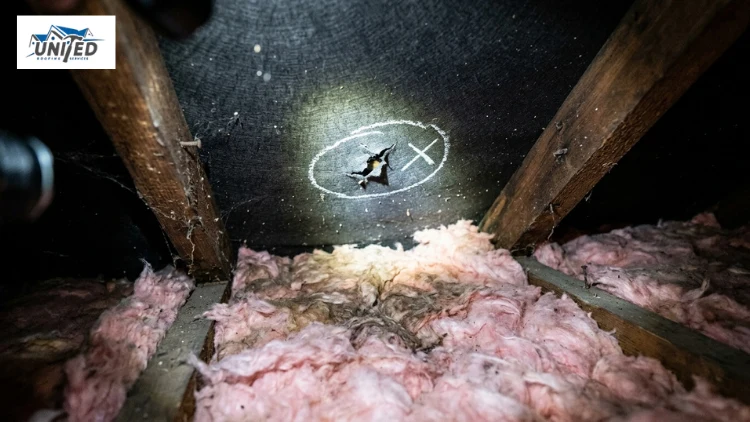
Go up on a bright day, kneel on a board and switch off the lights. Give your eyes a minute to adjust. Pinpricks of light mean the felt has a hole, or a tile above has slipped. Mark each spot with chalk or tape so you can find it again.
Follow the wet insulation
Water doesn’t always drip straight down. It can run along the felt before it finds a way through. When you find damp insulation, trace the stain upwards and sideways to where the water entered, not just where it landed.
Other clues to look for
- Dark tide marks on the rafters
- Droppings, nesting material, or gnaw marks
- A musty smell, or condensation on the underside of the felt
- Stains on the bedroom ceilings below the loft
Loft Safety Before You Start
A loft is not a floor. Respect it.
- Kneel and walk only on the joists, or lay a sturdy board across them. Never step on the plasterboard ceiling.
- Use a head torch so you can keep both hands free.
- Keep clear of cables, junction boxes and downlighter housings.
- Wear gloves, safety glasses, and an FFP2 dust mask, as loft dust and old insulation can irritate skin and lungs.
- Ask someone to stay downstairs while you work.
The Health and Safety Executive also publishes work-at-height guidance, including advice on working near fragile surfaces.
Tools and Materials You’ll Need
A basic roof felt repair kit is cheap and fits in one bag:
- Self-adhesive bitumen repair tape, or manufacturer-approved tape for a breathable membrane
- Cold-applied roofing mastic or compatible felt adhesive
- A sharp utility knife or scissors
- A soft brush and clean, dry cloths
- A small roller, or a block of wood wrapped in cloth
- Chalk or tape for marking
Roof Felt Repair From Inside the Loft: Step by Step
This is the heart of the job. Follow the order, because each step prepares the next.
Step 1: Get into position
Place your board beside the damaged spot, not over it. You should be able to kneel or sit and reach the felt without stretching. If you have to lean, move the board and start again.
Step 2: Identify your felt type
Look and feel before you touch anything.
If it is black, thick and slightly sticky or stiff
That is bitumen felt. It takes bitumen tape and mastic.
If it is grey, white or blue with a fabric-like texture
That is a breathable membrane. It needs the tape or adhesive its manufacturer recommends.
The choice matters because some bitumen products can react with synthetic membranes, and membrane tapes grip poorly on old bitumen. If you can’t tell, look for printing on the underlay and check the maker’s guidance.
Step 3: Move the insulation aside
Roll back the insulation around the damage and leave about 50 cm of clear working space so you can properly see the felt edges. Stack the insulation loosely to one side, away from the eaves.
Step 4: Test the surrounding felt
Press gently around the damage with a gloved finger. Sound felt stays flexible and in place. If it flakes or tears further under light pressure, it won’t hold a patch, and forcing the job will widen the problem. Stop there and call a roofer.
Step 5: Clean and dry the area
Brush away dust and cobwebs. If the felt is damp, blot it with a dry cloth and leave it to air until it’s dry to the touch. Tape and adhesive won’t grip a damp or dusty surface, and sealing moisture against the timber invites rot.
Step 6: Trim ragged edges
Cut away loose, frayed felt to flatten the surface. Keep the cuts small and tidy. A smooth base helps the patch bond and stops the tear running further.
Step 7: Size and cut the patch
Cut a patch that extends at least 7 to 10 cm beyond the damage on every side. A generous overlap resists lifting. Round the corners with scissors, because square corners peel up more easily.
For a pinprick hole, a short strip of tape or a dab of mastic can replace the patch.
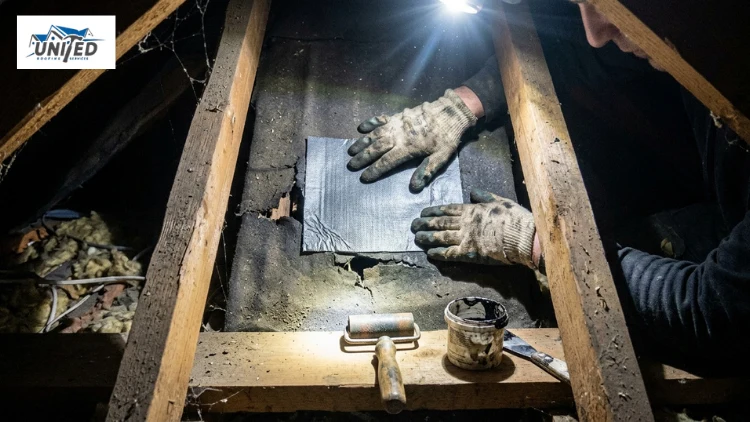
Step 8: Apply adhesive or tape
On bitumen felt
Brush a thick, even coat of cold-applied mastic over the damaged section, then coat the back of the patch. Spread it slightly past the patch edge. With self-adhesive tape, peel the backing back a little at a time as you press it down.
On a breathable membrane
Use only the manufacturer’s tape or adhesive. Work from one edge to the other so air escapes rather than getting trapped in a bubble.
Step 9: Press the patch firmly into place
Smooth the patch outwards from the centre with a small roller or your wrapped block. Firm, even pressure pushes out air pockets and forces the adhesive into the felt. Pay extra attention to the corners and edges, since they lift first.
Step 10: Seal the edges
Run a bead of mastic around the patch border, or lay a second strip of tape over each edge, then smooth it flat with a gloved finger or spatula. This edge seal stops water creeping underneath, and it is the step people rush most.
Step 11: Let it cure
Check the product label for drying time and for the minimum working temperature. Cold lofts slow curing, so allow longer in winter. Don’t touch the patch, and keep insulation off it until it has fully set.
Step 12: Replace the insulation and test
Put the insulation back, then check the repair after the next heavy rain and again a few days later. A dry patch is a good sign. A damp one means water is getting in elsewhere, and a roofer should take a look.
Need a Second Opinion on Your Loft?
Not sure whether your damage needs a patch or a bigger fix? A short visit can settle it. Contact us for a free, no-obligation inspection, and we’ll tell you honestly what the roof needs and what it doesn’t.
Mistakes That Undo an Inside Repair
Beyond the steps above, these three slip-ups cause most repeat leaks:
- Using duct tape or gaffer tape. The temperature swings in a loft break the adhesive down within weeks. Only roofing repair tape or bitumen products are made for the job.
- Skipping the outside check. Before you blame the felt, look over the roof from the ground, using binoculars if you have them. A slipped tile will keep feeding the same spot.
- Patching the same spot again and again. A second repair in the same place signals the cause lies elsewhere.
When an Inside Repair Isn’t Enough
If any of the limits above apply, or if a leak returns after you’ve patched it, the work belongs on the roof’s exterior. A roofer lifts the tiles along the affected strip, renews the felt, replaces damaged battens and can fit an eaves tray where old felt has sagged into the gutter.
Many homeowners ask whether they can replace roof felt without removing tiles. For a true replacement, the answer is no, because you have to remove the tiles along that strip. From inside, you can repair roof sections, but you can’t refelt them.
At United Roofing Services Ltd, we handle roof repair services in Richmond, from a single slipped tile to felt renewal across a section of roof, and every job comes with a fixed written price. If the roof needs more than a repair, we also handle full re-roofing and our full range of roofing services across Richmond.
FAQs About Roof Felt Repair
Does home insurance cover roof felt damage?
It depends on your policy and the cause. Sudden storm damage is more likely to be covered than gradual wear. Photograph the damage before and after any repair, and check your policy wording or ask your insurer before starting work.
Does wet loft insulation need replacing after a leak?
Not always. Wet insulation insulates poorly until it dries, so first fix the source of the water. Lightly damp insulation can usually be lifted and left to dry in a ventilated space. If it is soaked, smelly or mouldy, replace it.
How long does roof felt last?
It depends on the type, the quality of the installation and how well the loft is ventilated. Older bitumen felts often show their age after a few decades. Modern breathable membranes are made for long service, but check the manufacturer’s stated design life for your product.
Is it safe to leave a small hole in roof felt unrepaired?
It isn’t advisable. Even a small opening lets in wind-driven rain and moisture, which soaks insulation, stains ceilings and can rot timber over time. Small tears also tend to widen.
Can I use silicone sealant or expanding foam on roof felt?
Generally not. Silicone doesn’t bond reliably to bitumen, and foam isn’t a waterproof layer and can trap moisture or push the felt out of place. Use roofing-grade repair tape or mastic instead.
